YOUR HOME - EXTERIOR LOOKS
The Winter Garden
February, 2014 - Issue #112
 Courtesy of Shutterstock |
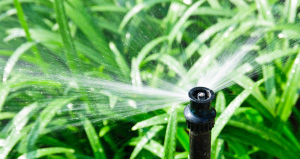
Homes with automatically-timed irrigation systems use about 50 percent more water outdoors than those without. Your system can waste even more if it's programmed incorrectly, a sprinkler head is pointed in the wrong direction or you have a leak.
When it comes to a home's irrigation system, a little maintenance goes a long way. Before you ramp up your watering efforts, spruce up your irrigation system by remembering four simple steps.
Inspect: Check your system for clogged, broken or missing sprinkler heads.
Connect: Examine points where the sprinkler heads connect to pipes or hoses. If water pools in your landscape or you have large wet areas, you could have a leak in your system.
Direct: Are you watering the driveway, house or sidewalk instead of your yard? Redirect sprinklers to apply water only to the landscape.
Select: An improperly-scheduled irrigation controller can waste water and money. Update your system's watering schedule with the seasons.
Free consultations are available for water-wise landscaping ideas and inspiration. NV Landscape, INC. 286-8888
 Courtesy of Shutterstock |
Offers Free Workshops for a Beautiful,
Water-efficient Garden
February 15: The Edible Landscape
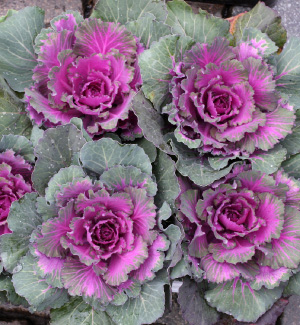
Plants that produce fruits and vegetables don't have to be confined to the garden; they can be used throughout the entire landscape. See how!
March 15: Beautify your Yard with Annuals & Perennials
Learn about various annual and perennial plant varieties that will grow in the SCV. Also delve more into the concept of using low-growing plants as turf-grass substitutes.
April 12: Water Works - The Basics of Landscape Irrigation
Participate in a discussion about the components that make up a typical irrigation system and learn how it all goes together, as well as proper operation.
Call CLWA to register for the classes of your choice. 513-1230
 Courtesy of Shutterstock |
Planting a
Bare-Root Rose
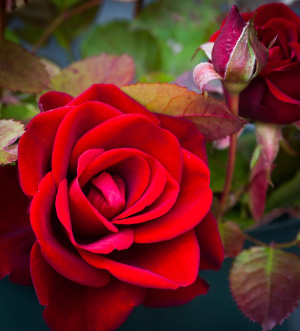
You can buy bare roots - dormant plants sold and shipped without soil around their roots - and plant them in late winter in warm climates or early spring in cold climates.
Proper care of bare roots will lead to healthier, more beautiful roses. You don't need a green thumb to have a blossoming yard; just the ability to follow directions and keep up with required maintenance.
If bare roots arrive before you prepare the planting hole or the ground thaws, it's important to protect them until you can get them in the ground. As long as the roots stay moist, they'll be fine for a day or two.
Open any plastic wrapping around bare roots, and refresh roots in a bucket of water if you will plant them within 12 hours. Otherwise, sprinkle roots with water and leave them wrapped in plastic for a day or two.
Give your roses the right environment for growth. Select a location where they'll receive at least six hours of sun. The site should be permanent, away from competing trees and shrubs. Don't expect a plant to live in the same spot where another rose died.
There are only four steps to a successful planting of bare-root roses. Follow these directions and you'll be on your way to a rose-filled yard.
1. Before planting bare-root roses, soak the roots in a bucket of water for at least two hours and no longer than 12 hours. Prune roots that are broken, injured or too long.
2. Dig a hole 12 to 18 inches deep and two feet wide, keeping the backfill close. Add two shovelfuls of composted manure or compost to the hole, then mix it into the bottom soil.
Set the plant in the hole and spread the roots evenly around it. Position the plant so that the bud union - a swelling at the base of a grafted plant where the new plant was grown on the rootstock - is one inch above the soil surface in warm climates or one inch below the surface in cold climates. Use your shovel handle as a guide.
Own-root roses differ from grafted or budded stock. Grown from cuttings, they develop their own root systems and don't have a knobby bud union. Simply plant them about 1 inch deeper than they were planted in their pot.
3. Backfill the planting hole two-thirds full, add water, then allow it to drain. This helps settle the soil. Fill the hole with more soil; water again.
4. Prune new roses back by one-third to concentrate the plant's energy in growing roots; remove any dead or broken wood to foster strong canes. When planting container-grown roses, keep pruning to a minimum at planting time. Wait several weeks until leaves develop and canes resume growing, then feed.
TIP: If you buy potted plants that have already commenced growing, plant them as you would any garden plant, anytime from spring through early fall.
Green Thumb 259-1072
You can Compost! (And You Should!)
We get it. Compost can, when poorly cared for, be smelly. It can attract bugs. And you might wonder why, if you're not a gardener, you should bother with composting at all.
Here's one really good reason: We're running out of space in our landfills - and if we don't start cutting back our trash soon, we're going to find the next big heap of yuckiness and methane in our own backyards.
A full 20 to 30 percent of what goes in our trash is food scraps and yard waste, both super easy items to compost. For a compost pile to stay healthy, you only need four "ingredients": browns (i.e. leaves and twigs), greens (i.e. grass and food waste), oxygen and adequate moisture to keep the bacteria happy. Why not keep these items out of the trash can and put them where they can be of some use?
Some folks will tell you that you need to layer this and that in order to have happy compost. They're right - if you're trying to create a compost nirvana for your garden. If you're just trying to not destroy the environment, though, we've had equally good results with putting compostable items in the pile as they become available, then giving it a quick "stir" as necessary.
You can buy a composting bin or bucket if you'd like to really go the extra mile, or you can be cheap about it. We know several SCVians who use the space behind their retainer wall as the spot to dump the day's food scraps and yard waste.
What you do with your compost once it's, well, composted is up to you. Some people don't do a thing with it. Compost breaks down considerably and pretty quickly; you may never notice your pile growing much if you do little to maintain it. It will nourish the soil around it and keep stuff out of the trash. Mother Nature approves of this casual composting.
But if you've come to love your compost and want to see it put to ideal use, apply it before setting down your roses or trees; top existing softscape with it for a nutrition boost; or use it to transplant veggie plants and flowers.
|
||||||||||||||||||||||||||||


